Jump that TOC with InstaDrop!
11 November 2017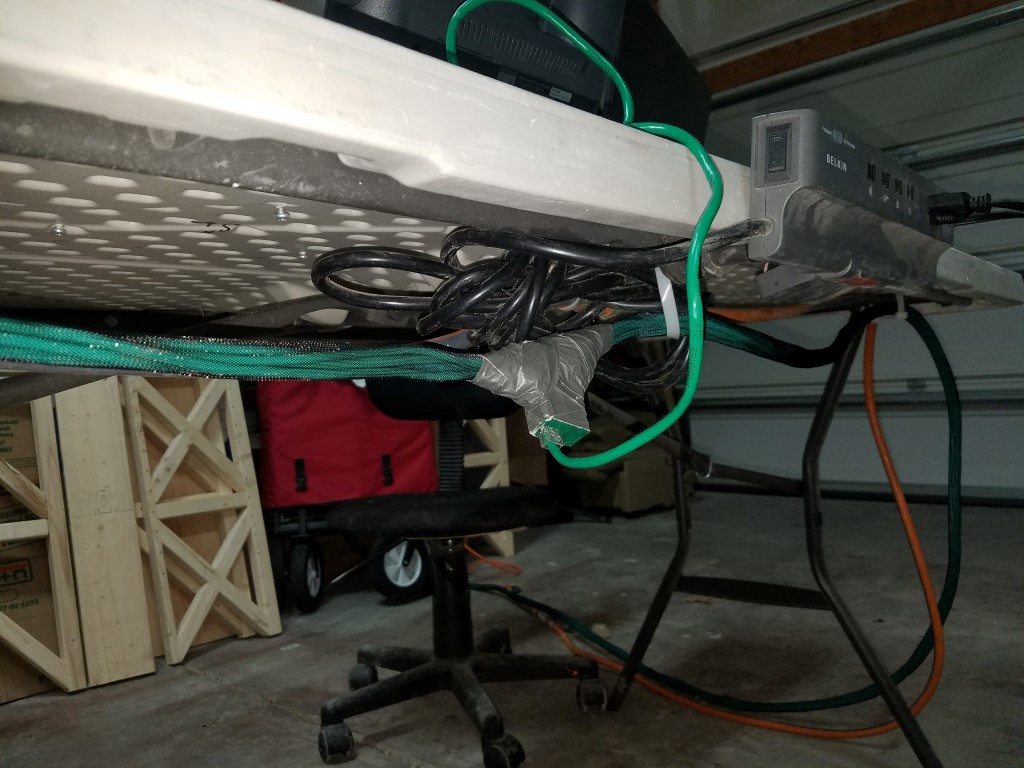
CAT5E is expensive. Our unit would go through several boxes during exercises or deployments just making 20-30ft long patch cables to support, most of which was only used during that mission only to be bundled up and taken to post recycling afterwards (cause we're environmentally friendly!). Not only monetarily is it expensive, but time wise, it was taxing. A well trained installer can terminate a CAT5 cable in about 4 minutes on average. To wire up 8 drops, it takes one installer working about an 45 minutes after taking into account running the cable properly.
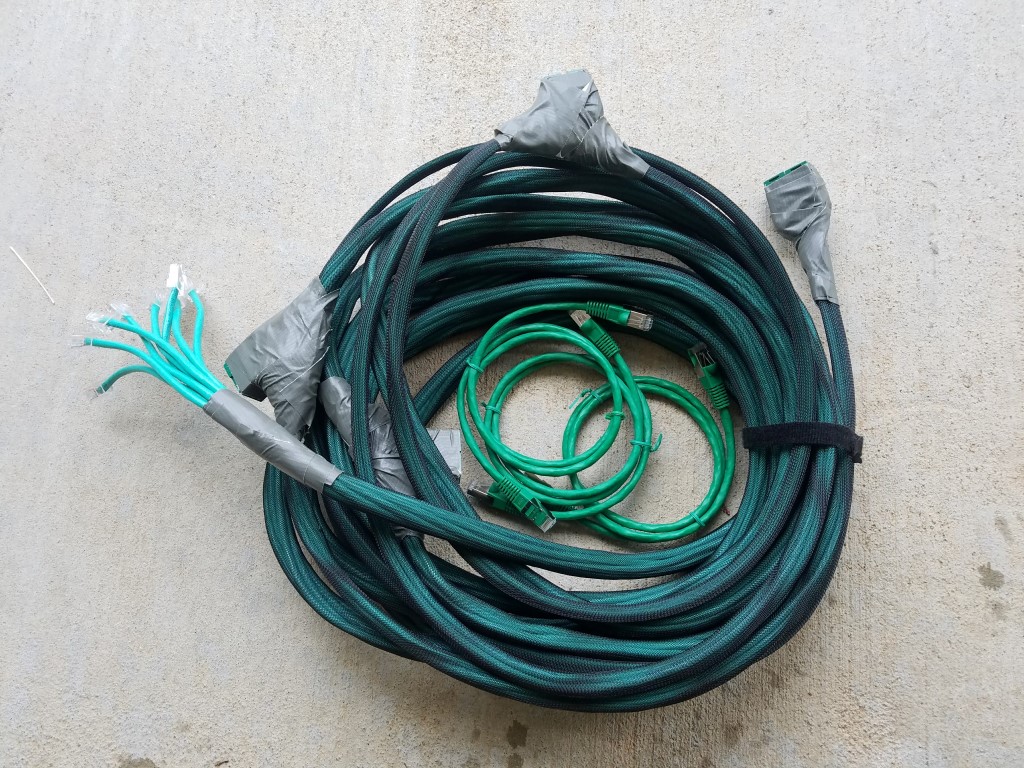
Enter the InstaDrop system. This DIY project provides 8 drops of re-usable cable to a TOC, cuts that 45 minute installation time to about 5 and in the long run saves you green: green cable, green money and green environment (not that I'm a hippy or anything, blood does more to make the green grass grow).
As stated, this project can be a DIY project. It takes a single skill level one soldier who knows how to terminate cable about 2 hours to make one of these "whips". If you get 3 on the project, it might cut that production down to about an hour. I found that doing this on a riggers table makes it a lot easier than running it down a hallway.
Materials and Tools List
This project will cost between $60.00 to $160.00 per whip depending on the type of cable and connectors you end up using. Panduit EGJT doesn't come cheap. But all of it is well worth the investment.
Here's what you'll need per whip:
| Item | QTY |
|---|---|
| CAT5E (in your preferred color) | ~250ft |
| 8P8C Male connector | 8 |
| 8P8C Female connector (in your preferred color; I used Panduit but a basic Leviton will work too and cost less) | 8 |
| Duct/100mph tape; 3" wide is best | 1/2 roll |
| Masking or bright marking tape | 1 roll | 3/8" OverExpanded Braiding (I used MSOVR038 in black, but the color of the cable came through fine) | ~60' |
| 8P8C M Crimper | 1 per installer |
| 110 Punch (for Leviton) | 1 per installer |
| EGJT Tool (for Panduit) | 1 per installer |
| Tape measure | 1 |
| Diagonal Cutters of Scissors | 1 |
Procedures- The Whip
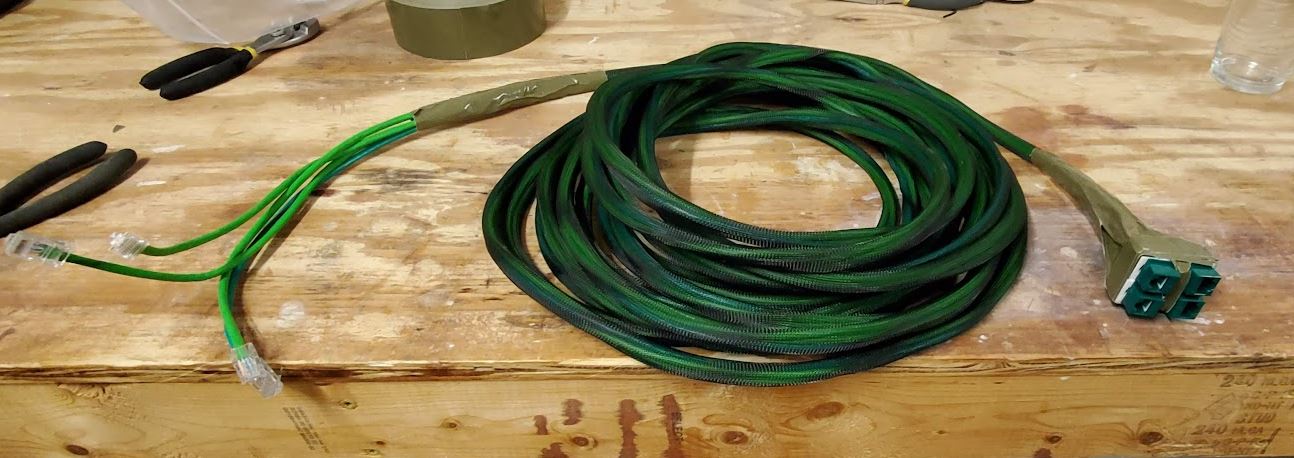
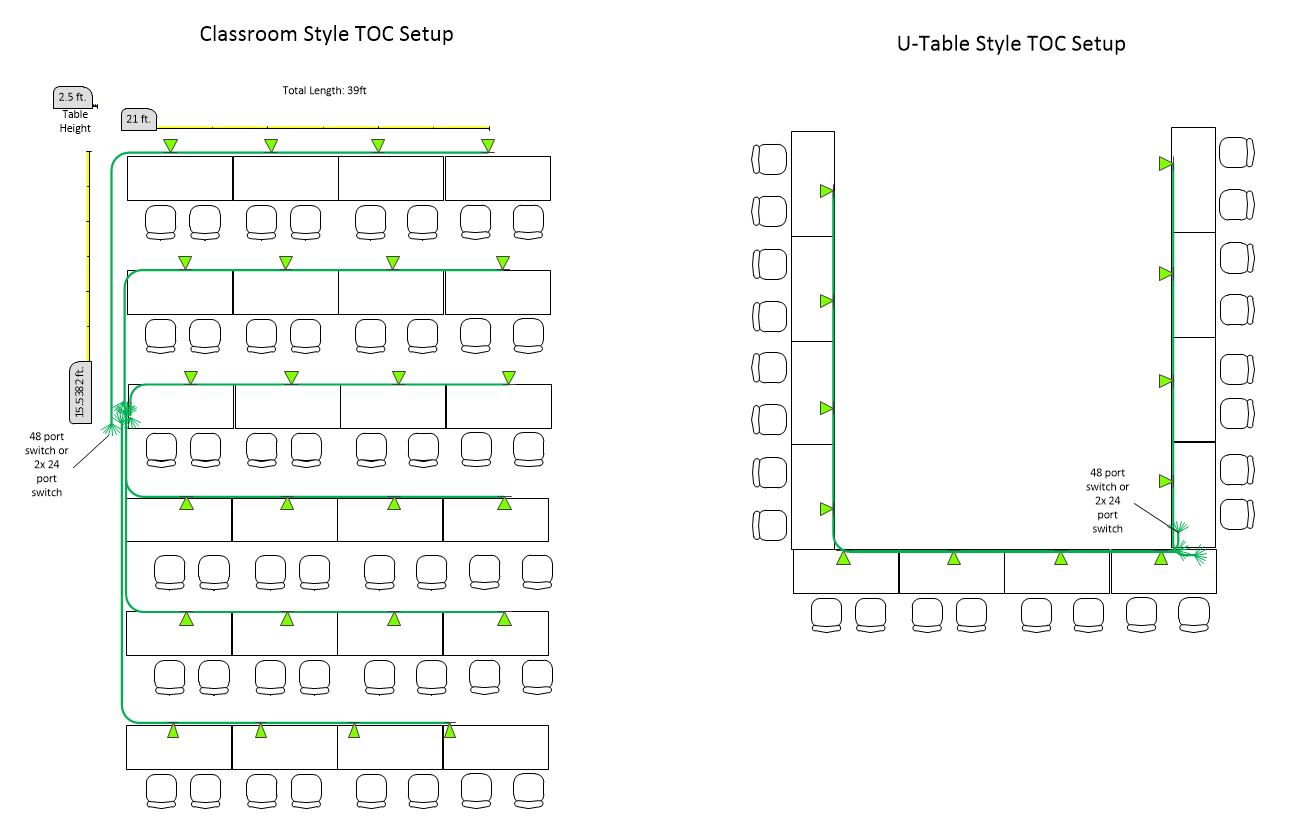
Check out the plans attached.- On a rigger table or in a hallway, use strips of duct tape to mark where each pair of drops will be terminated at and the start point: at 21', then 27', 33', 39'.
- From the start point, run two pairs of cable approximately 3 inches past the 39' marker and tape it to the table or floor to hold it in place.

- Use masking or marking tape to tape the two pairs together at the tips. (the marking tape will help you find the pairs of cable in the braided sleeving later)
- Cut the pair of cable about 9-10 inches before the start point
- Run two pairs of cable in the same way to the 33' point, than 27' and 21' points, taping them all down in the same manner to hold them in place and mark
- Bundle and tape all the tips of the cables together at the start point putting a quick release in the tape so you can remove it later. This will make the next step easier.
- From the start point, start routing the cable through the overexpanded braiding. This is like a Chinese finger trap so it's usually best to pull/milk in about 6 inches at a time, let it bunch up and every so often "expand" it out over the length of the cable. You'll run the braiding over the entire 39' run without any breaks or cuts to the braiding stopping about 3-4 inches before the end of the last pair of cables. Remove the duct tape holding the cables in place as you go
- Milk out all of the slack in the braiding to ensure the braiding hugs the cable tightly through out
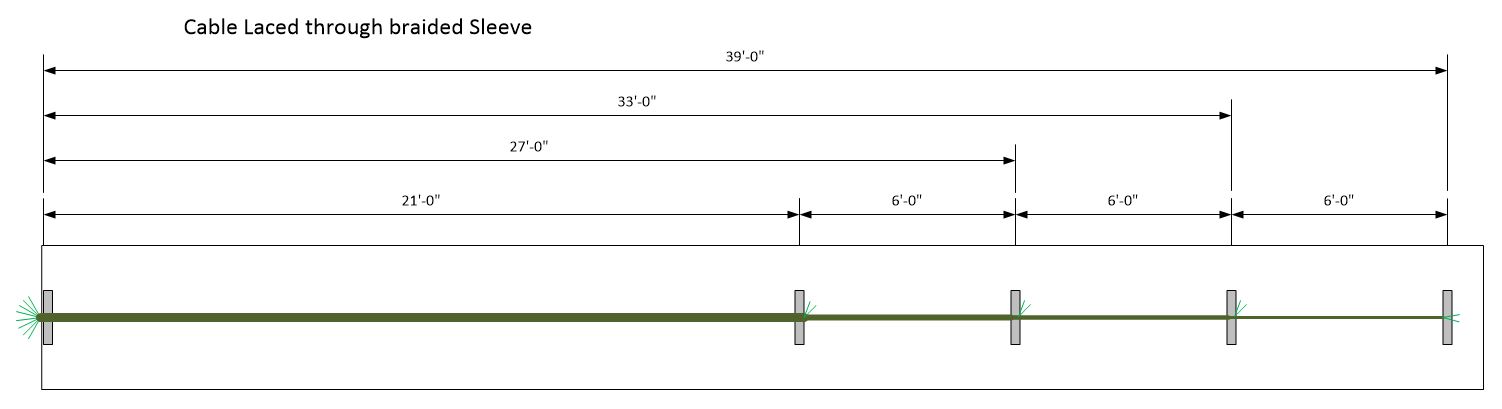
- Once the braiding is ran to the full length of the cable whip, look for where the masking/marking tape is on the pairs of cable inside the braiding. Approximately 3-4 inches before the marking tape, cut a hole into the braiding to pull the pair through, ensuring not to cut the cable jacket
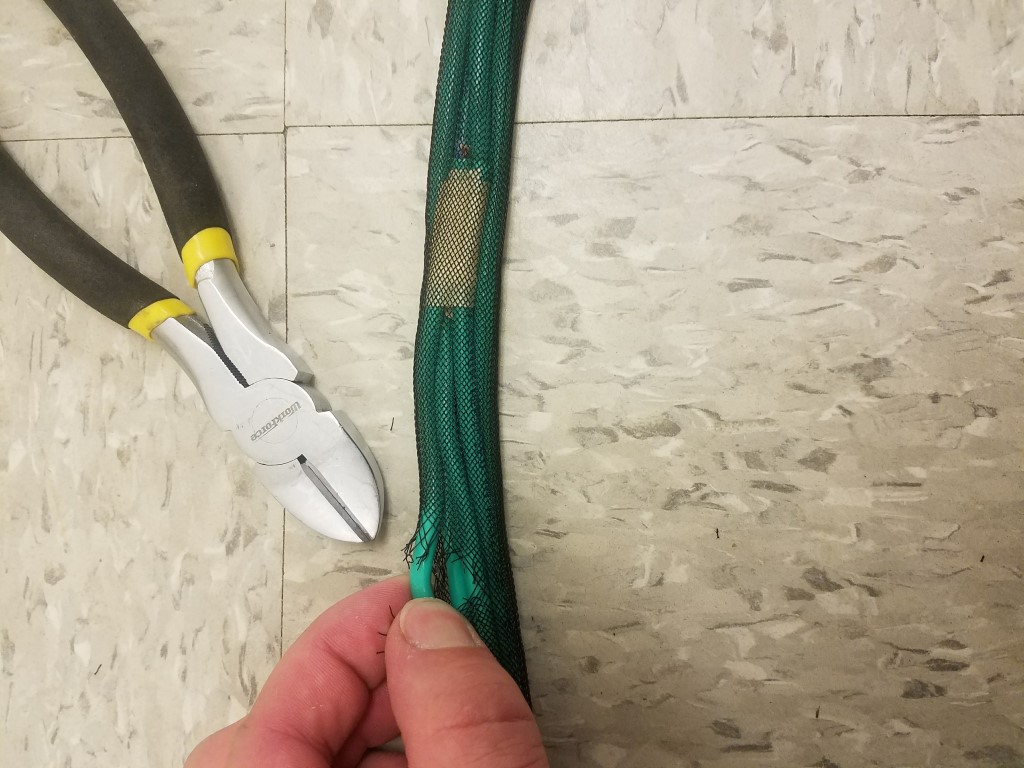
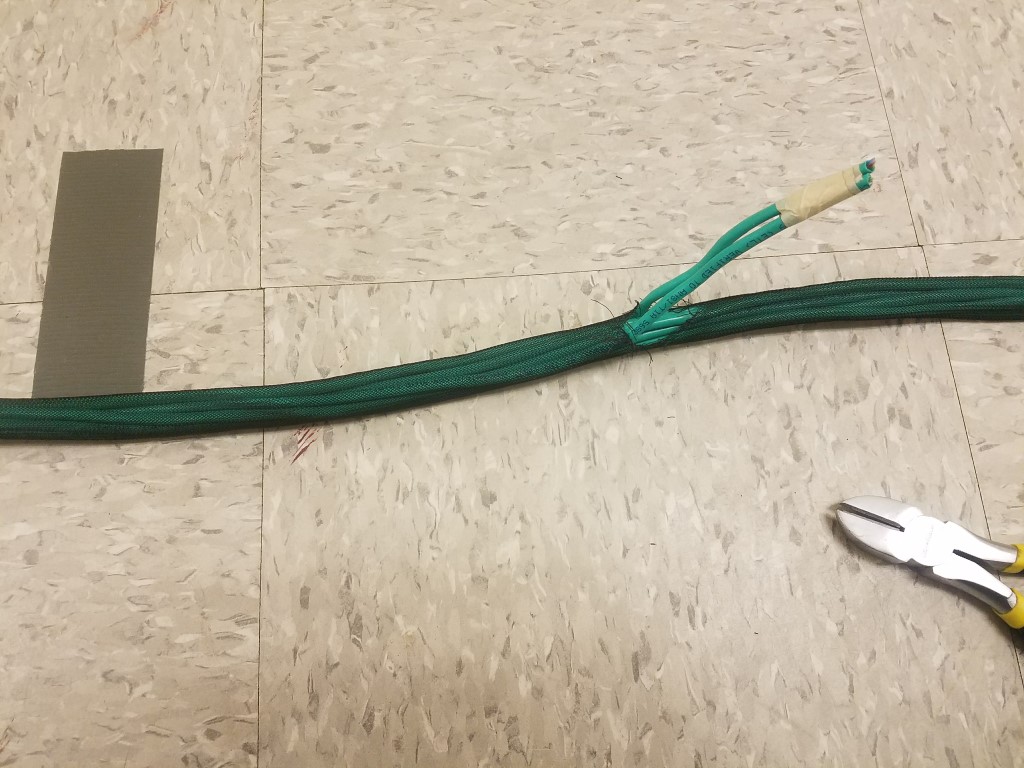
- Do this for each pair
- At the start point, cut the sleeving about
9-10 inches18-20 inches from where the cables begin
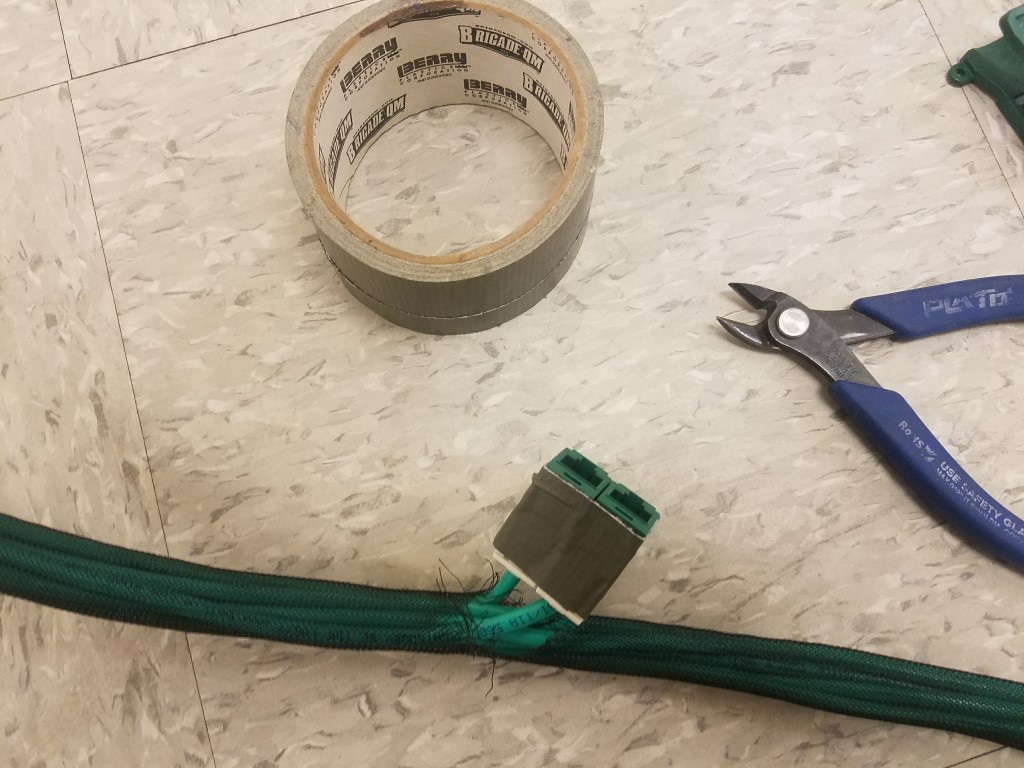
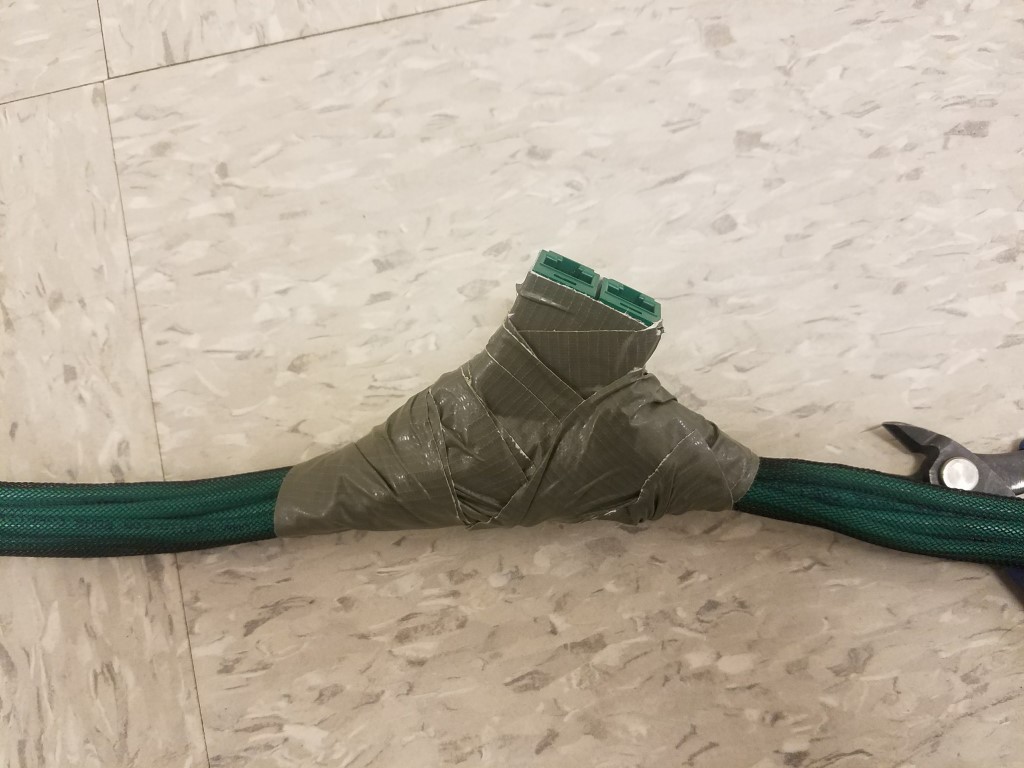
NOTE: We changed this on ours to about 20 inches so that there are 18" of free cable coming out of the sleeving which makes it easier to connect to the switch than 8" were. - use the duct tape to tape the sleeving to the cables at the start point
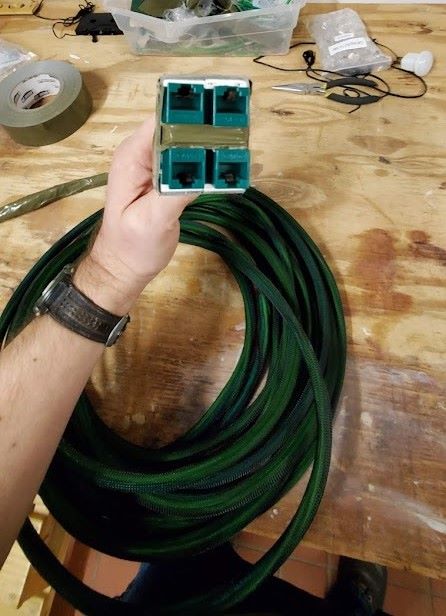
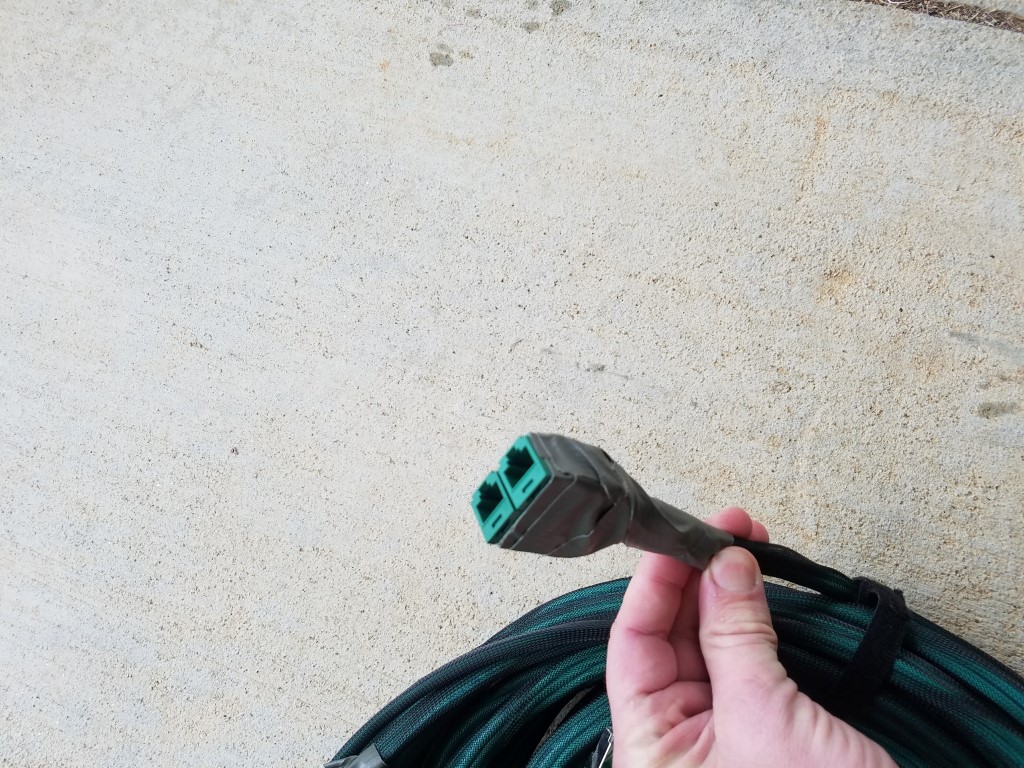
- terminate each cable at the start point with a male connector
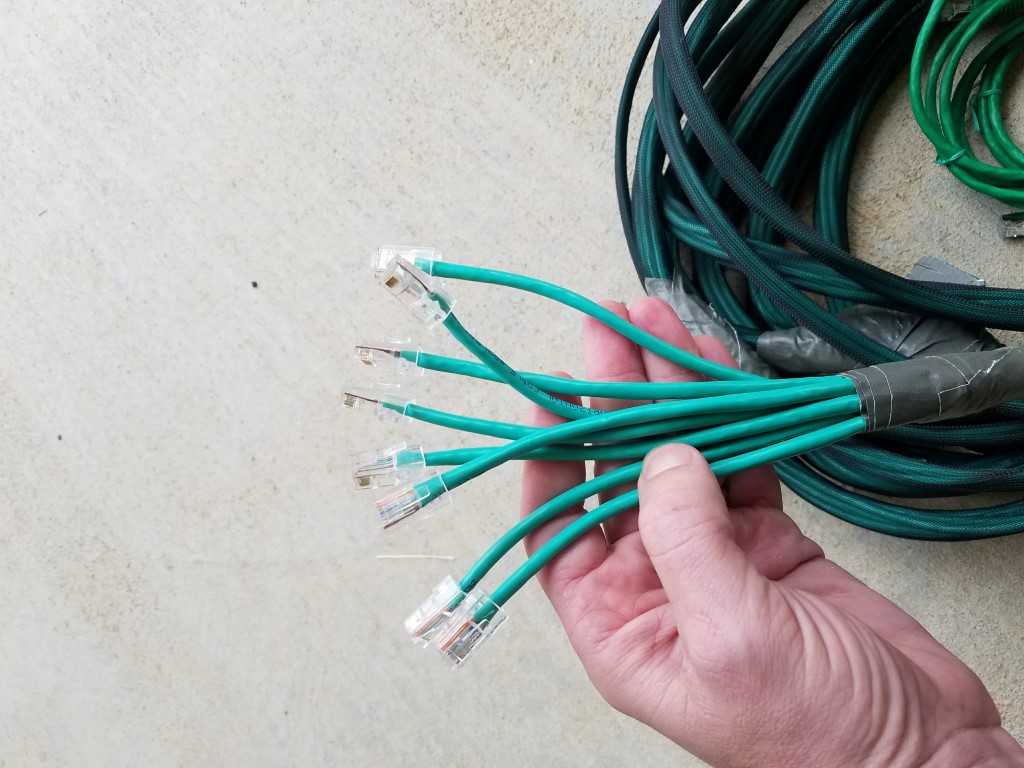
- Terminate the far end for each pair with a female connector
- Test each pair to ensure proper termination
- Use a strip of duct tape to tape each pair of female connectors together flush with one another and then use the roll of duct tape to make a sort of molding around the pair so they are held on place and off to the side of the whip at your desired angle
- Optionally, use a label maker to mark each end with a unique number to ID which drop relates to what cable
- Roll it up, you're done!
The End!
The Mace
The Mace is a variation of this original concept that has 4 connectors at the end and none in between. It can be made at any length and is best used for work group style TOC layouts. Sometimes I call them "Bangers" because you can swing the end around and bang people in the head with it.